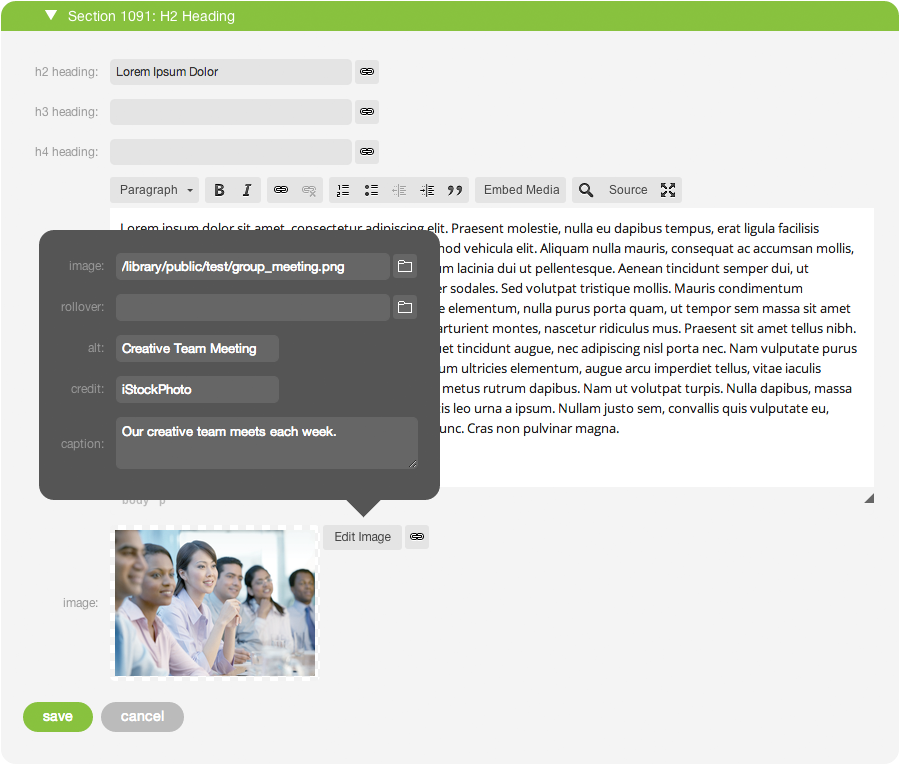
To add an image to a section, edit a section by clicking the edit button on a section's card title bar. Click the box labeled “image” near the bottom of the card. A panel will appear containing several fields (see screenshot). The first of these (“image”) is the primary image for the section. A second “rollover” image can also be included if you intend to add a link to the image.
Note: rollover functionality will only work when a link is applied to the image.
To add an image, you must first upload it to your Library. If the image is already in your Library, click the Library button next to the image field and navigate to the image you wish to add. When you click the file name in the Library, the Library window will close, and a preview of the image will appear in the image box, indicating that you have successfully added the image to your section. If the image you wish to add isn’t already in the Library but is stored on your hard drive, you can add it to the Library on the fly.
After you've added the image to your section, you'll likely need to change its size and positioning. See Section Layout for more information.

